Bypass Windows 11 Internet and Microsoft Account Requirements
Windows 11 normally requires you to connect to the Internet and sign in with a Microsoft account during installation.
This guide explains how to bypass those requirements and create a local account instead.
Method 1: Using Rufus
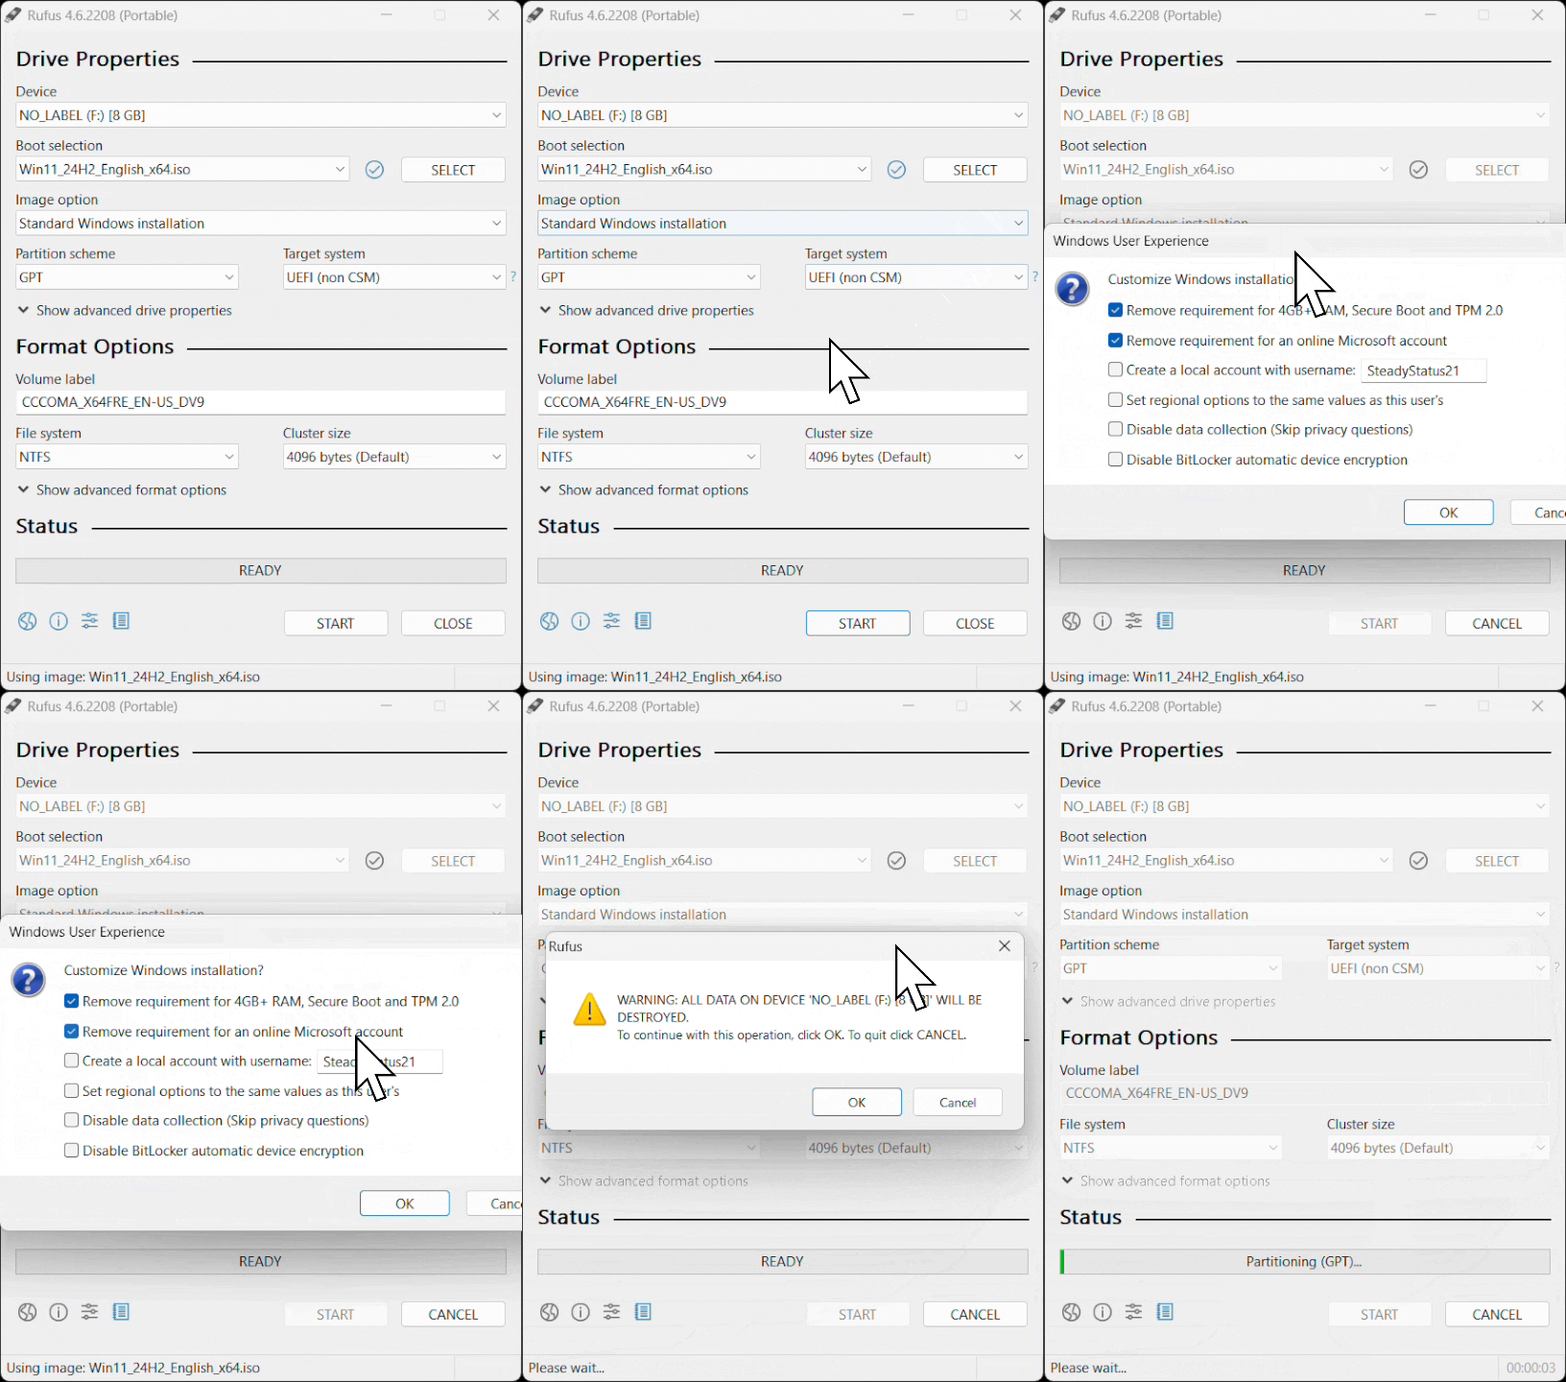
If you are creating a bootable USB drive with Rufus, it includes an option to automatically bypass the Internet and Microsoft account requirements.
Simply check the option when setting up your USB.

Method 2: Manual Bypass During Installation
IMPORTANTWindows 11 25H2 is now known to block these simple commands. Please scroll down to Method 3, which will describe how to do so.
If you prefer not to use Rufus, you can bypass the requirement manually during installation.
Step 1: Reach the Network Setup Screen
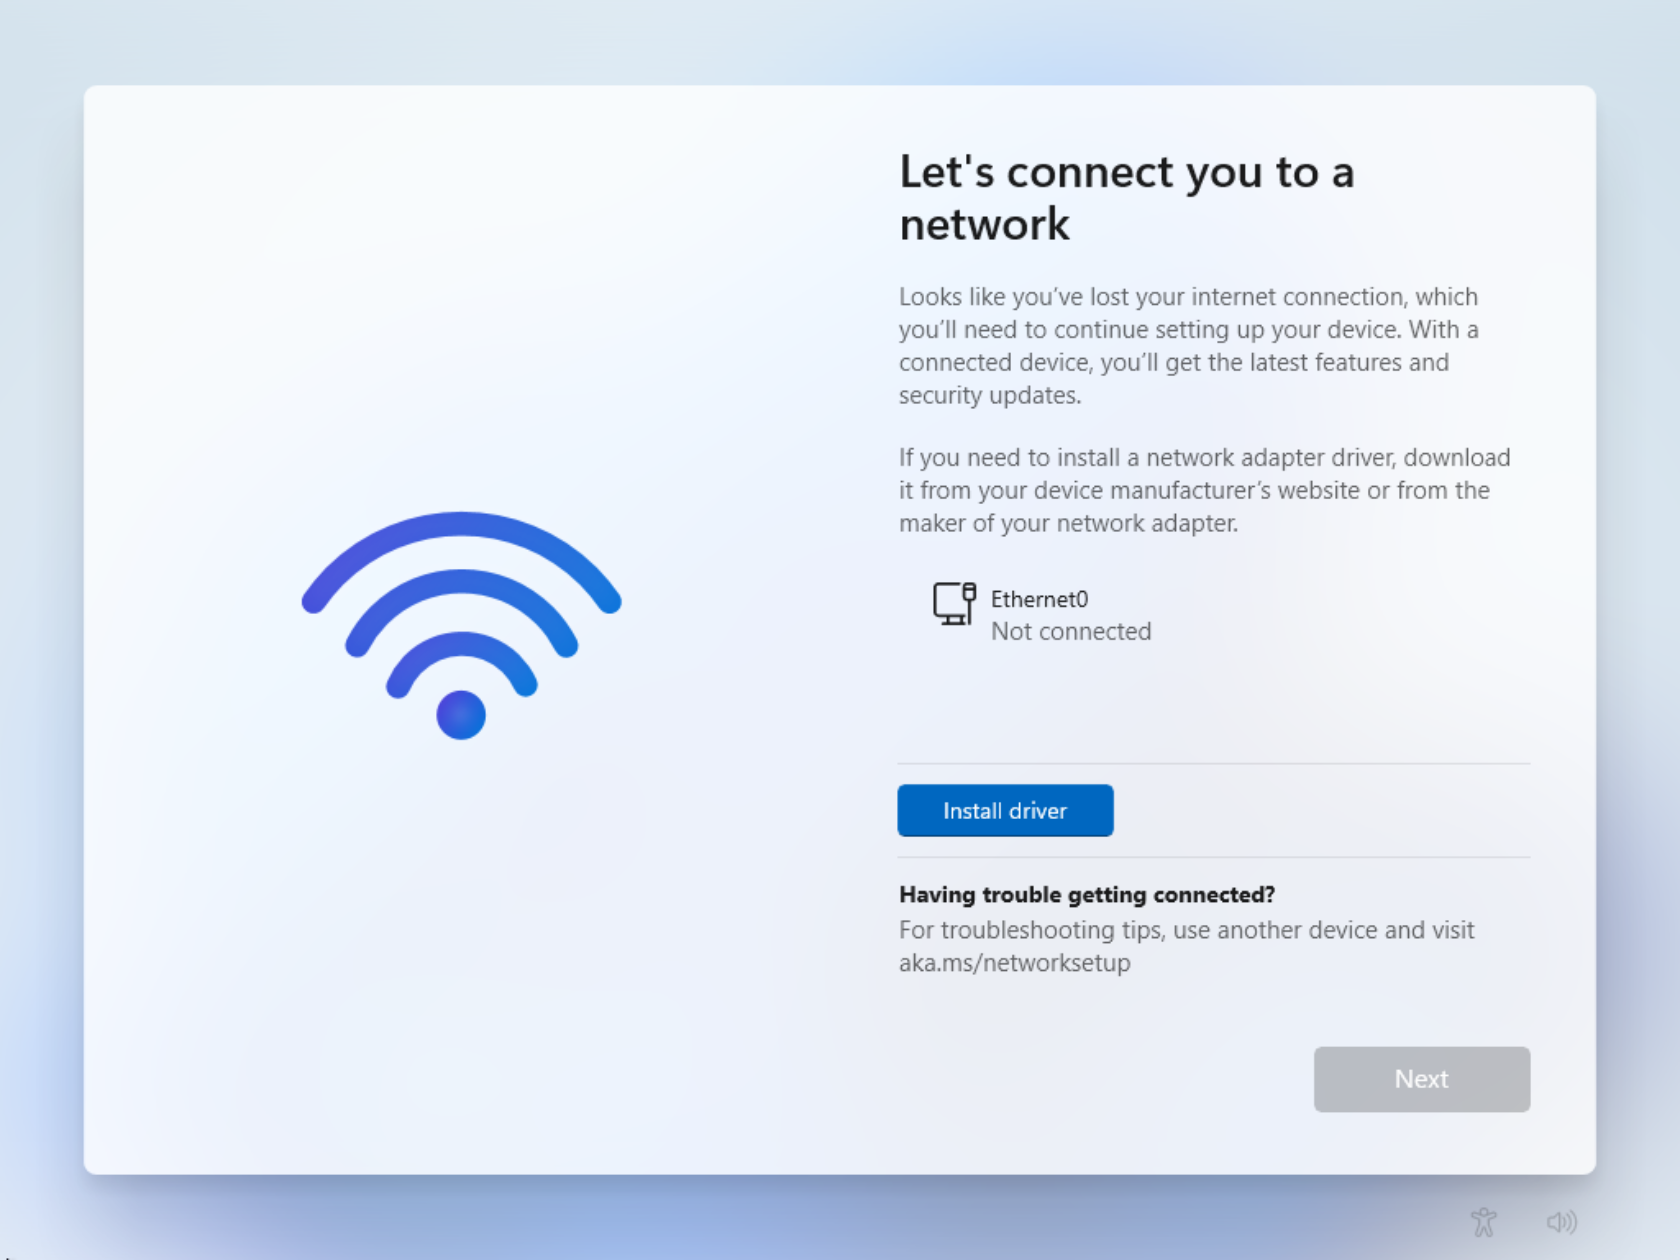
When you see the “Let’s connect you to a network” screen:
WARNINGDO NOT CONNECT TO THE INTERNET! ONCE CONNECTED, IT IS DIFFICULT TO DISCONNECT.

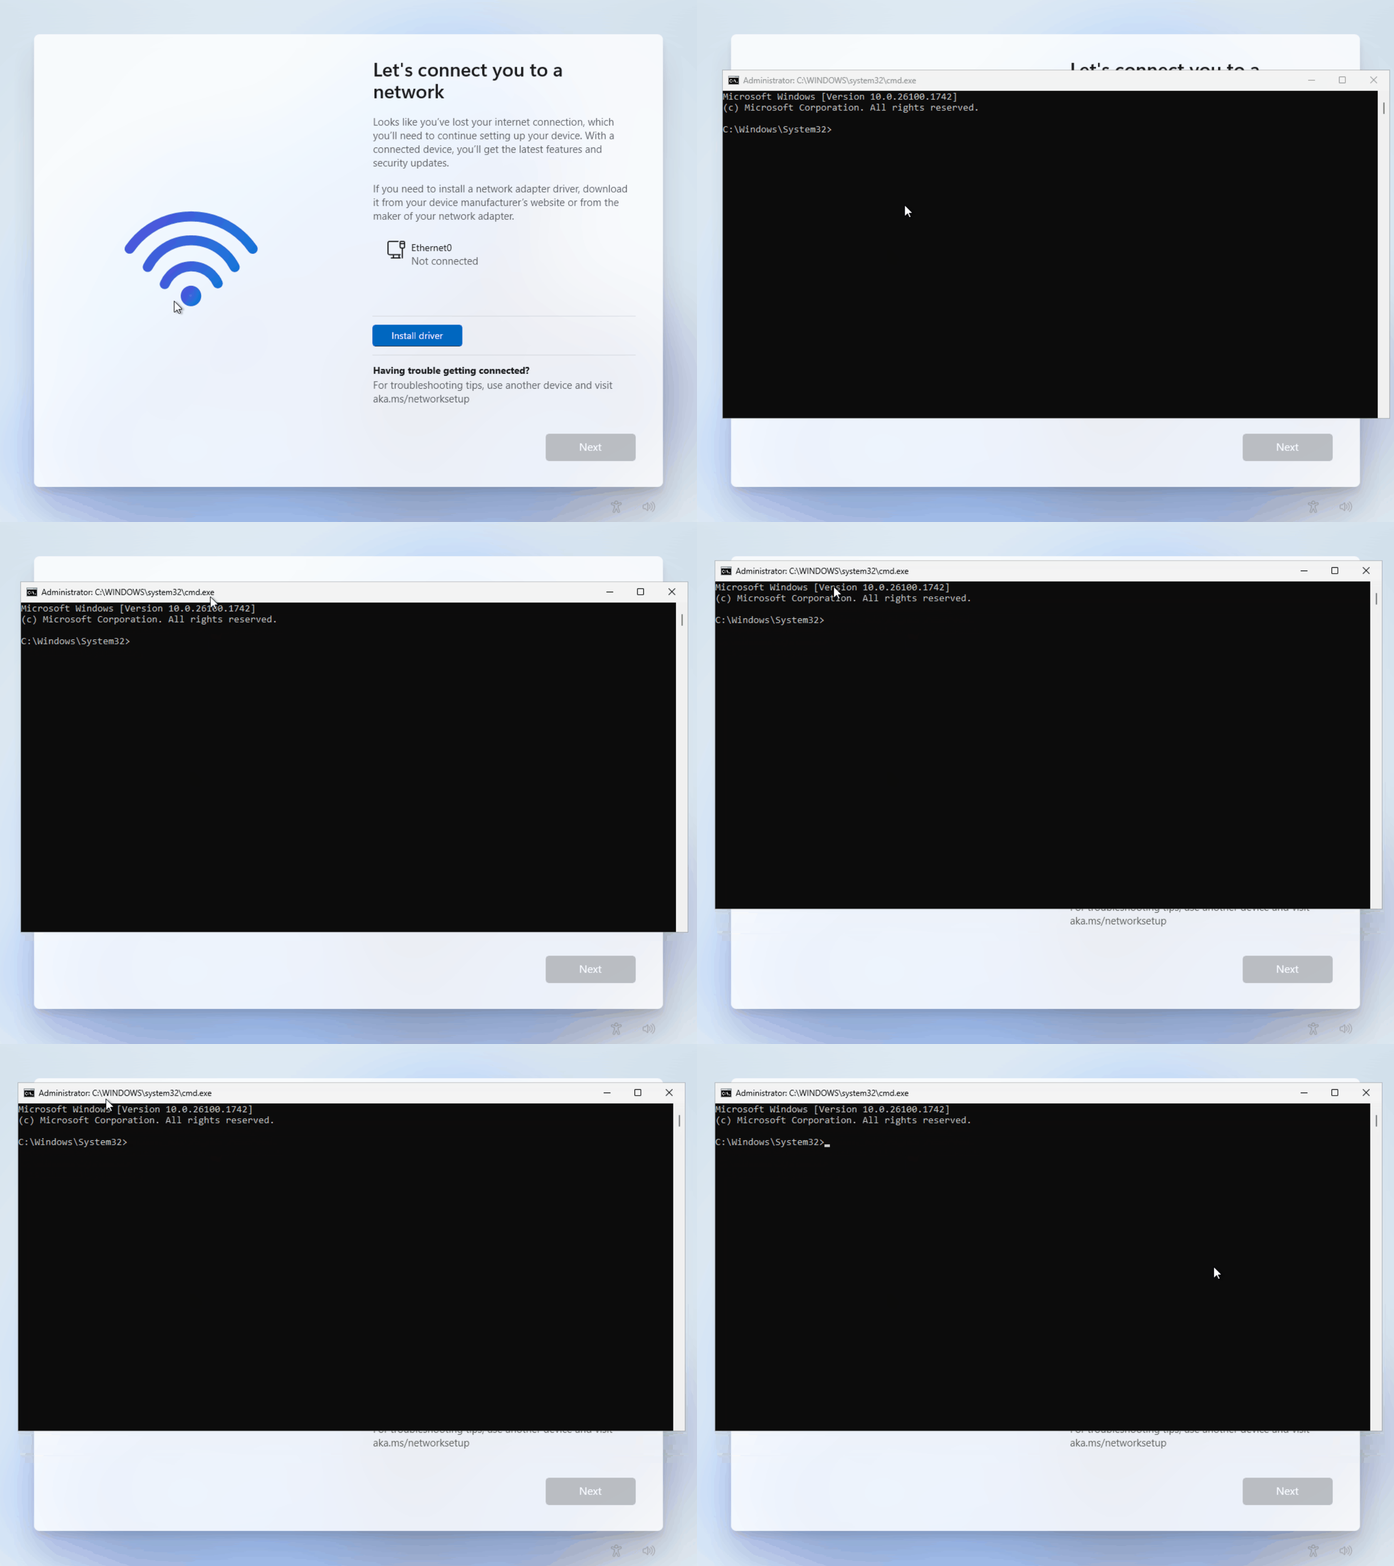
Step 2: Open Command Prompt
Press Shift + F10 to open a Command Prompt window.

Step 3: Run the Local Account Command
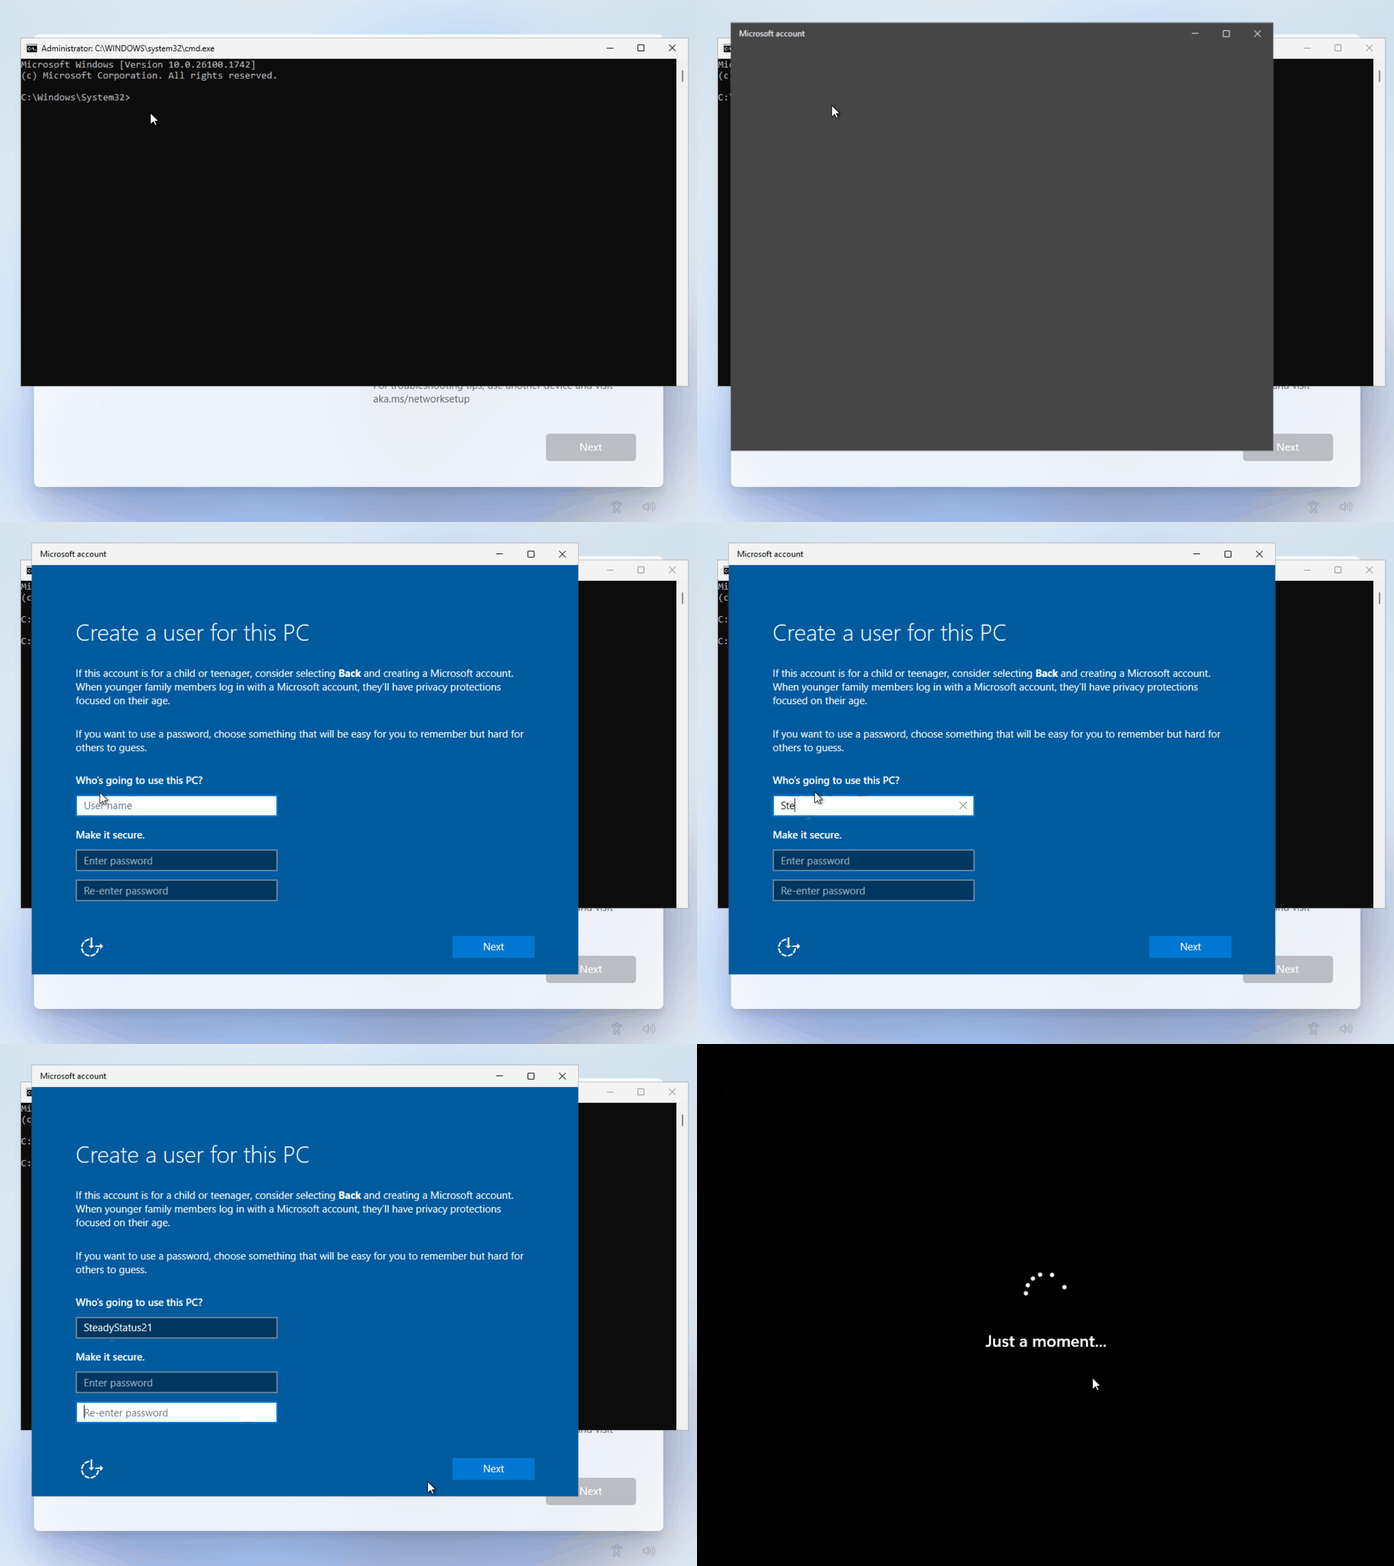
In the Command Prompt, type the following command and press Enter:
start ms-cxh:localonlyWARNINGPlease set a secure password when configuring Windows this way. In my demo below, I didn’t configure a password. Those fields are where to set your password.

Method 3: New(ish) Bypass of Microsoft Accounts in 25H2
NOTEMicrosoft is currently taking actions against commands that are known to bypass the Microsoft Accounts screen. You can still use Rufus, and if this method doesn’t work, you can always install an older version of Windows 11 like 24H2, and then update when ready.
Step 1: Reach the Network Setup Screen
Follow the steps above for opening the Command Prompt in the OOBE. (Step 2 of Method 2)
Now, once here, enter the following commands:
reg add HKLM\SOFTWARE\Microsoft\Windows\CurrentVersion\OOBE /v BypassNRO /t REG_DWORD /d 1 /fshutdown /r /t 0Once rebooted, continue setup normally.
Thank you to @TheBobPony on Twitter for showcasing this older method again!